Wednesday, February 26, 2014

Week 8: Picture Frame and Mirror Revamp

After painting my hallway last month (Week 2 post), I am finally getting around to getting things up on the walls.

First, I bought a really fun rug for $8 on sale that I thought would look good with the color of the walls:


Next, I figured I would try to repaint the picture frame and mirror I had hanging up before I painted the hall for an easy (and cheap) way to update the old hall decor.  Here's what the frame and mirror looked like before against our yellow walls:


The frames and mirror didn't look good against the new paint, so I painted each one a dark teal color on the inner and outer frame and painted the middle the same paint color as the wall.  


I really like the distressed look of the other frames and mirror, so I used sand paper to sand down the teal so parts of the old green paint peeked out and used a coarse-bristled paint brush with a mixture of brown/black paint.  I initially painted the mirror with 2 coats of teal, so when I couldn't sand down as much as I wanted to I had to use the coarse paint brush and some green acrylic paint to mimic the distressed look.  I am pretty happy with the results!


Now I just need to figure out how I want to decorate the rest of the hallway!

Rachel

Wednesday, February 19, 2014

Week 7: Baby Quilt for Baby Josie

I found out my good friend Ann just had her baby today; a little girl named Josephina who they plan to call Josie.  She was the one that I made the baby headbands for in my Week 5 craft.  Ann wanted to wait to have her baby shower with some friends until after the baby is born so we can all get together and meet her,  and even thought it's a few weeks out I wanted to get the baby quilt made for Josie so I wasn't scrambling at the last minute like usual.  

Initially I wanted to make Josie's quilt match her room decor, but I saw that someone had purchased a bedding set for her from Ann's registry that included a quilt.  So my next thought was to make a quilt that the baby could use in other places or play on that in no way would match her bedroom.   The quilt ends up measuring 42" by 42".

I made each of my twin baby nieces a quilt for Christmas and started making my other niece a quilt, so by this time around I barely needed to reference the tutorial I relied on so much with the other quilts, found at http://www.diaryofaquilter.com/p/beginning-quilting-series.html.  Here are pictures of the two quilts I made for the twins:


To begin the quilt for Josie, I started by looking through fabric at the fabric store and finding the large flowered print for the backing of the quilt and tried to find some fabrics in coordinating colors to go with it.  I struggled a bit because the colors are not as common, but here is what I came up with:


Instead of buying only fabrics for the squares I bought 10 since I couldn't decide on which fabrics I wanted to use.  When I laid all fabrics out after I cut the squares, it looked just a little too orange:


I figured all those orange squares coupled with an orange border was a little too much so I swapped out some of the orange squares with the spare dark pink flowered fabric I bought.  The result seemed to balance out the quilt a little more.


I pieced all the squares together and sewed the border around the squares.  I then stitched diagonally through all the squares to attach the top to the batting and backing.  Once I got the binding stitched on I was finished! All in all it took me only 2 days to cut, piece, and sew the quilt together.   

Here are some pictures of the finished quilt for baby Josie. The lighting is not the best but I was pretty happy with how it turned out and I am hoping Ann will like it too! 


Until next week! 

Rachel

Monday, February 10, 2014

Week 6: Baby Burp Rags and Pacifier Clips

This fall I made a lot of burp rags for friends and family, so my mom just commissioned me to make some burp rags for a baby shower she is attending this spring.  She sees how much my little nephew loves his superhero burp rag- well maybe my stepsister loves the burp rag as she did tell me she uses it as a drool rag, blanket, burp rag, etc.  Here's a couple pictures of the ever-adorable Logan (and my beautiful mother)!


The burp rags are so easy to make and are pretty cheap to do!  First I bought a 4 pack of colored diaper cloths from Jo-Anns.  They were 40% with a coupon and I also had an additional 20% off so when they are originally $6.99 per package I got them for next to nothing!  

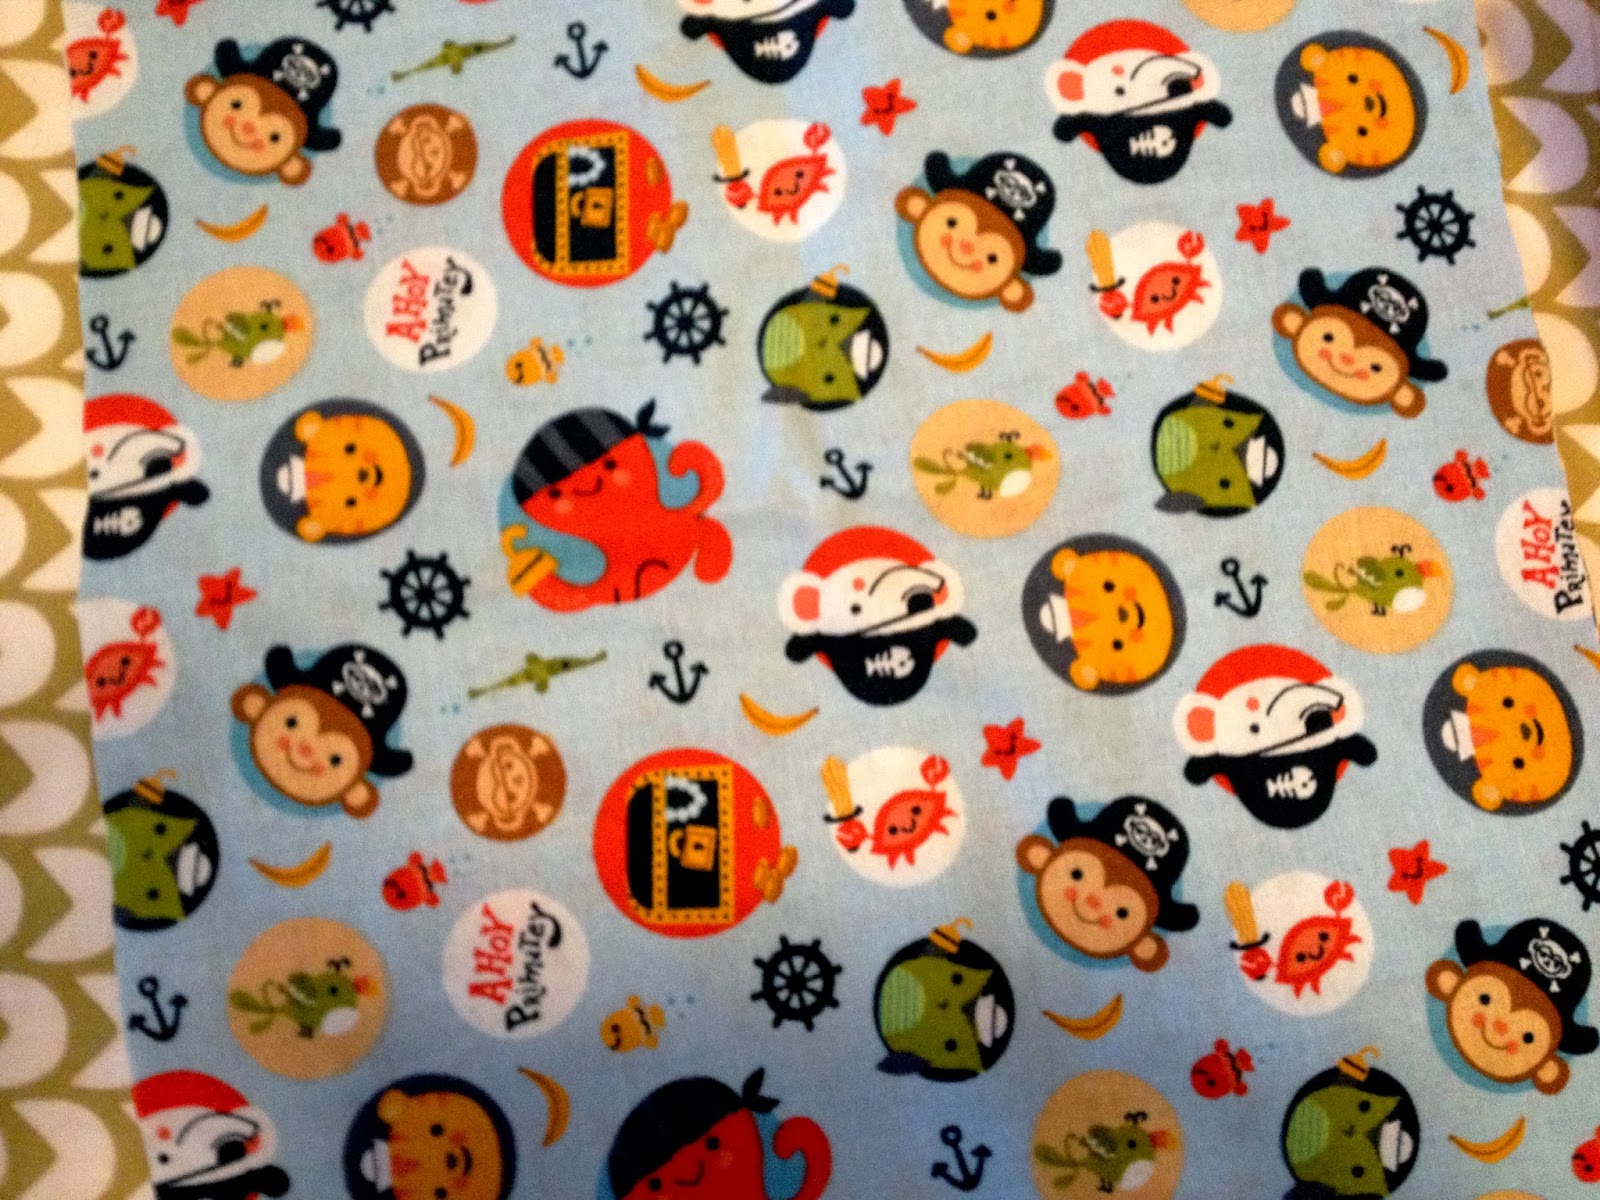
I did have some leftover fabric from some baby boy burp cloths I made this fall, but when I was at the fabric store I came across this adorable print of baby animal pirates and the saying "Ahoy Primatey".  How clever! :) 


I didn't want to make all 4 the same, so I laid out all my leftover fabric against the lighter colored blue diapers to see what would look the best: 


I eventually decided on the striped little monster fabric for the additional 2 rags.   The best part about that fabric was that is was already cut!  So I started by washing and drying the diapers and new fabric.  Then I ironed all of them out and measured the length and width of each diaper.


Mine measured about 4 1/2 in by 17 inches, and I added 1/2 inch to each measurement to allow for a hem folded over.  After I used my rotary cutter, cutting mat, and large mat ruler to cut the fabric, I folded a 1/4 inch hem around all sides, ironed, and pinned the fabric to the diaper.


Next I sewed all sides using a zig-zag stitch to make the hem look a little more fun.  This stitch also allows for minor imperfections so I really like to use it on these burp rags where the hem stitch isn't hidden.  I did this for the remaining pirate rag and the 2 monster striped rags.  Here are some pictures of the finished rags!


Next my mom wanted me to make some pacifier clips for her.  When I first went to the fabric store,  I found some clips that were like 2 clips for $4.  I was randomly in the laundry aisle and found these better clips aka Ironing Board Fasteners that were like 8 for $4, so naturally I got the 8 pack and just cut off the elastic.


I also bought some very thin elastic for the other end that loops through the pacifier.  I wasn't sure if I wanted to do both with ribbon or if I wanted to use fabric, so here are my materials laid out:


I decided to use the ribbon and looped it through one end of the fastener.


I could use my hot-glue gun but since I had my machine out and threaded with turquoise thread I sewed the clips.  I sewed a straight line along the bottom of the clip, sewed lines down both sides of the ribbon.  I cut some elastic and shoved both ends in the open part of the ribbon and sewed that end shut and made an X shape to keep the elastic down.


 I made the clips varying sizes since they were the same color, so the new mother could use one clip to clip to the baby or car seat and another clip to clip to the crib or whatever else she wanted that was a little longer.

I am hoping my mom and the baby mama will be happy with rags and clips!

Rachel

Sunday, February 9, 2014

Week 5: Baby Rosette Headbands

My best friend Ann is having a baby next week and I wanted to make a little something to bring for the baby.  I'm hoping it works out that she has her baby by the time I pass through the city where she lives on my way home from a work trip in Iowa.  I already made her some burp rags, and the other day I was looking up how to make some baby headbands.  I was debating whether to make felt flowers or fabric rosettes, but ultimately I decided to make fabric rosettes since I made the felt flowers for the burlap wreath I made in Week 1.

So, I gathered my supplies:  glue gun, glue sticks, brown and yellow elastic, and various fabric/felt scraps that would be long enough for me to make into flowers.


I started by cutting out a small circle of felt and cut the white and yellow polka dot fabric and the teal polka dot fabric into strips about 1 1/2 inches wide.  I glued one end of the strip to the middle of the felt and started wrapping the fabric around the starting point. I did glue at various points along the way to ensure each new layer of fabric wouldn't come undone, and when the rosette was as large as I liked I cut the fabric strip and glued a little piece around the back of the rosette.  Here's how the first one looked: 

 
At first I thought I only wanted to make 1 rosette, but then I decided one larger rosette with two smaller ones would look cuter so I made two baby rosettes to accompany the large one for each of the headbands:


Since I have a sewing machine and I was getting really sick of burning my fingers with hot glue, I decided to sew the headband ends together instead of gluing them.  Next I tried to guess where the rosettes would look best positioned on the headband if the seam was at the back of the baby's head.  Since I don't have any kids I couldn't try it on!  I also guessed on the length and read somewhere that a newborn is 12 inches elastic, newborn to 6 mo is 14 inches.  I wanted the baby to be able to wear it pretty early on, so I made it for 13 inches.  

Once the headband was sewed together then I glued the rosettes on and I had myself two baby headbands.  I was pretty happy with how they turned out, so I am keeping my fingers crossed that my friend likes them as much as I do! :) 


Rachel